Sangoma P-Series and D-Series — setup for our PBX
Sangoma is the Canadian company that owns Asterisk and FreePBX; its phones usually arrive at a venue together with a FreePBX or Switchvox server and configure themselves from it at the press of a button. With us it is different: the platform runs no provisioning server of its own, so the phone has to be configured by hand — and this is where the two Sangoma lines behave differently.
- P-Series (P310, P315, P320, P325, P330, P370) — the current handsets. They have a full web interface with a Lines tab where the SIP account is entered field by field. That is what we need, and the whole guide below is about them.
- D-Series (D40, D45, D50, D60, D62, D65, D70, D80) — the previous generation (the Digium heritage). It is designed to be configured from a configuration server: the phone discovers FreePBX/Switchvox over mDNS or receives the server address through DHCP option 66. There is a separate section about that at the end of this page. On top of that, vendor support for the D-Series ended on 1 December 2023.
Shared credentials, network requirements and typical mistakes are on the overview page “Setting up SIP phones”.
What you need#
- A Sangoma phone cabled into the same network as your computer (powered over PoE from the switch, or from a power supply).
- The extension credentials from the admin panel: Admin panel → Telephony → Staff & groups → “Reset password” — the “Extension credentials” window (details).
- A computer with a browser on the same network.
- The phone’s factory administrator password —
789(usernameadmin). If the phone has already been attached to FreePBX or Switchvox, the password is different: Endpoint Manager sets222222, Switchvox generates a random one. Then you need a factory reset.
Step 1. Find the phone’s IP address#
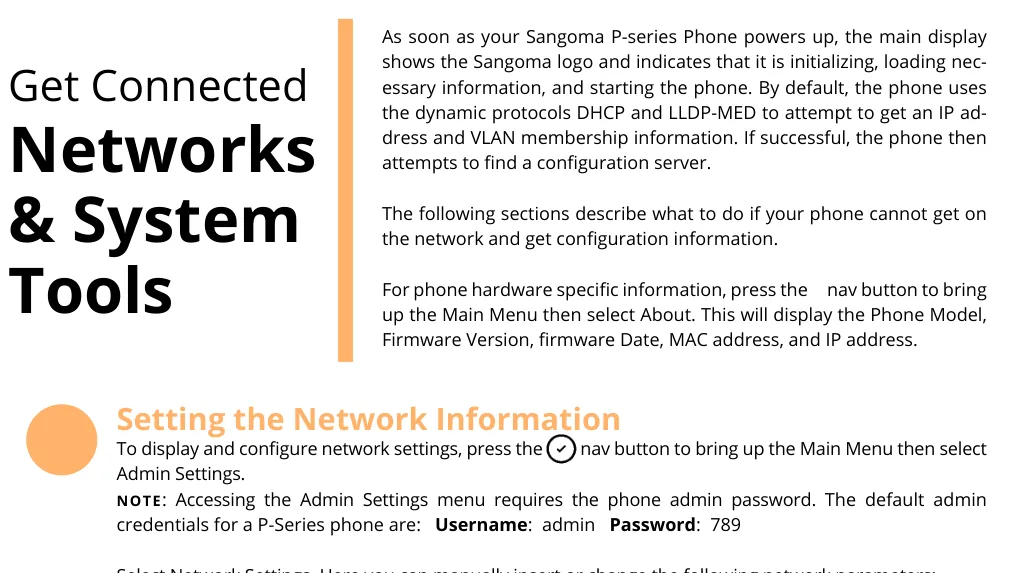
The phone gets its address over DHCP (and asks for a VLAN over LLDP-MED at the same time).
- Press the nav button to open the Main Menu.
- Select About — the screen shows the model, firmware version, MAC address and the IP address.
- If the phone has no configuration yet, the same screen opens from the About softkey in the Settings menu.
 Screenshot: Sangoma P-Series IP Phones User Guide, p. 5.
If there is no DHCP in your network
Main Menu → Admin Settings (the phone asks for the administrator password, 789 at factory defaults) → Network Settings. The Next softkey switches Protocol from DHCP to Static and opens the IP Address, Netmask, Gateway, Primary DNS (and optionally Secondary DNS) fields. Submit restarts the phone with the new settings.
Step 2. Log in to the web interface#
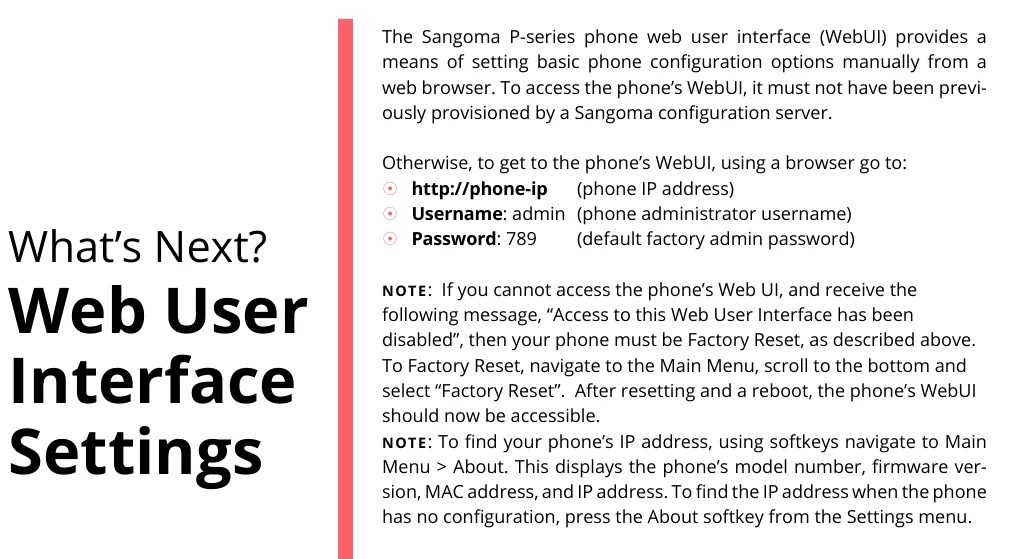
Open the phone’s address in a browser.
| Factory value | |
|---|---|
| Address | http://<phone IP> |
| Username | admin |
| Password | 789 |
| Password after Endpoint Manager provisioning | 222222 |
| Password after Switchvox provisioning | random, look it up in the Switchvox admin tool |
 Screenshot: Sangoma P-Series IP Phones User Guide, p. 9.
The web interface only opens on a phone that has not been provisioned by a Sangoma configuration server, or on a phone after a reset. The message “Access to this Web User Interface has been disabled” means exactly that — go to the reset.
Step 3. Enter the PBX credentials#
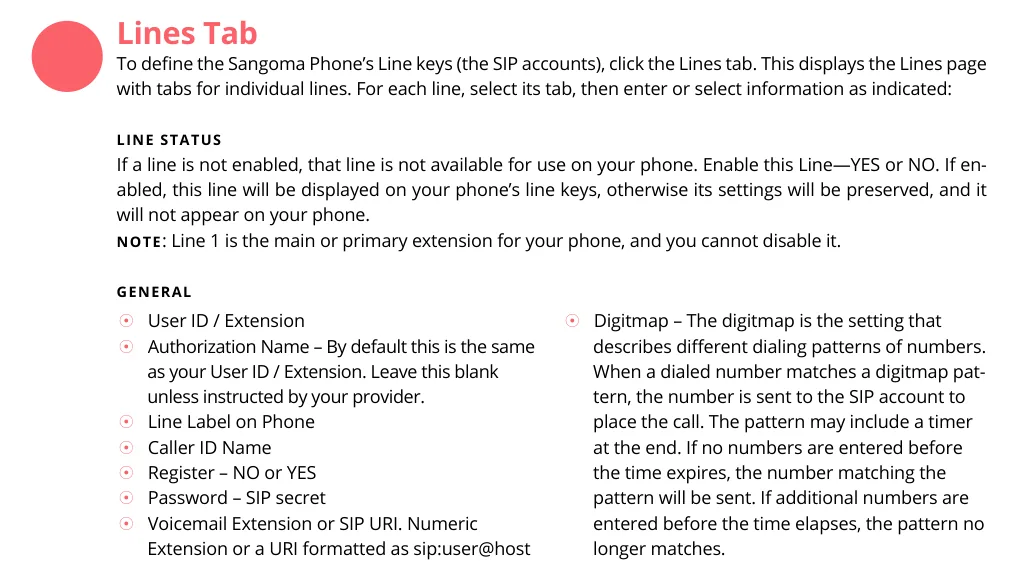
In the web interface open the Lines tab and select Line 1 (the first line is the primary one and cannot be disabled). Enable this Line must be YES.
| In the admin panel (“Extension credentials”) | On the phone (Lines tab, Line 1) |
|---|---|
| SIP server | Primary Host → IP Address or Hostname of SIP server |
Login (the whole sip-xxxxxxxx-101) |
User ID / Extension. Authorization Name repeats User ID by default — leave it empty if it is empty, or type the same login if it is filled in |
| Password | Password – SIP secret |
Port 5060 |
Primary Host → Port |
Transport UDP |
Primary Host → Transport — choose UDP (the list also offers TCP and TLS; our PBX does not provide TLS) |
| Extension number | Line Label on Phone and Caller ID Name — the line labels on the screen |
Be sure to set Register = YES — without it the phone will not register with the PBX. Leave Alternate Host and SIP Outbound Proxy empty: we have no backup server.
 Screenshot: Sangoma P-Series IP Phones User Guide, p. 9.
Press Submit Phone Settings at the bottom of the page — that button saves the changes from all tabs at once.
Optional: codecs, time, local port
Codecs — the Lines tab, the Advanced: Audio Codecs block: the arrow expands the list, the arrow icons reorder it. Our PBX needs G.711 A-law (PCMA), G.711 µ-law (PCMU) and G.722 — put them first.
Time — the General tab, the Time block: pick Timezone / Location and set an NTP Server. Without it, call history timestamps will be wrong.
Local SIP port — the General tab, Local SIP Port (factory value 5060). This is the port the phone sends SIP from; there is no need to change it and it is unrelated to the server port.
Who may call you. In the same SIP block you choose between “Accept all calls from any host” and “SIP Account Hosts”. The second is safer: the phone will only accept calls from servers it is registered with — that is, only from our PBX.
The administrator password is changed on the General tab, the Settings Password Protection block — worth doing right after setup instead of keeping the factory 789.
Step 4. Verify the registration#
- On the phone. The idle screen shows the line label you typed into
Line Label on Phone. Until the phone registers, calls will not go through. - In the admin panel. Admin panel → Telephony → Staff & groups: the operator gets a green dot and the identity string the phone reported (for example
Sangoma P325). The status comes from the PBX and refreshes at most once a minute. - Test call. Dial a colleague’s extension. If the call connects but only one side is audible, the problem is not registration but RTP: check SIP ALG on the router (overview).
Audio quality — the *43 echo test. The green dot only speaks about registration: the voice travels as a separate stream and breaks separately. Dial *43 on the phone and press Send / OK (most devices do not start dialling on a star key by themselves). The PBX answers, plays a short beep after a second and then plays your own voice back to you — speak into the handset for about ten seconds and listen to yourself. You hear both the beep and yourself: audio flows both ways. Beep but no voice: audio does not reach the PBX from the phone (SIP ALG on the router is the usual culprit). Not even a beep: audio does not reach the phone from the PBX. All outcomes and the measured numbers (loss, jitter, latency) are covered in “Checking call quality”.
Factory reset#
A reset is needed more often on Sangoma phones than on other brands: it not only wipes somebody else’s settings but also unlocks the web interface that the phone closes after being provisioned. A reset cannot be performed during an active call.
P-Series (P310–P370): Main Menu (the nav button) → scroll to the bottom of the list → Factory Reset. The phone clears the whole configuration and reboots; afterwards the web interface opens again with admin / 789.
 Screenshot: Sangoma P-Series IP Phones User Guide, p. 8.
D-Series (D40/D45, D60/D65, D70) — through the menu: the More → More → Menu → 5 (Advanced) → 2 (Reset to Factory Defaults) → Yes softkeys.
D-Series — during a restart (if the password is lost): restart the phone and after “step 2 of 8” press and hold the *, 8 and 6 keys simultaneously; release them when the “Resetting to factory defaults and rebooting” message appears.
D80 — during boot: while the Sangoma logo (or the Digium logo on older firmware) and the spinner are on screen, press and hold any three screen corners for 7 seconds. From the idle screen: the menu on the left (or the Menu icon in the top-left corner) → Advanced → Reset to Factory Defaults → Yes.
What is erased: the vendor warns that this removes all existing accounts and contacts as well as the whole phone configuration: server address, lines, network settings, the address of the previous provisioning server. The administrator password goes back to 789.
When you need it: the web interface answers “Access to this Web User Interface has been disabled”; the phone was bought second-hand or taken off somebody else’s FreePBX/Switchvox; the administrator password is lost.
After the reset the phone reboots, picks up an address over DHCP and starts looking for a configuration server again. If there is none in your network it simply stays unconfigured — open the web interface and follow steps 1–3.
If the phone does not register#
Register=NO. The most common cause: the credentials are in place but registration on the Lines tab was never switched on.- The line is disabled —
Enable this Linemust beYES. - A short number in
User ID / Extension. It needs the full loginsip-xxxxxxxx-101;Authorization Namerepeats it by default. - The password is stale. The admin panel shows the password once; if you closed the window, press “Reset password” on the operator and enter the new one.
- The web interface is locked — the phone lives by somebody else’s server configuration and everything you type gets overwritten. It needs a reset.
- Transport set to TLS.
Primary Host → Transportmust beUDP: our PBX does not provide TLS. - The phone found another configuration server in the network (a FreePBX in the venue, DHCP option 66 from the previous provider) and restores its settings after every reboot. Remove option 66 from your DHCP server and reset the phone.
- General network causes — SIP ALG on the router, client isolation on Wi-Fi, blocked ports: see the overview.
Still stuck — or the phone is registered but there is no audio, calls drop after 30 seconds, incoming calls do not arrive? Troubleshooting by symptom — “Phone not working”; on-screen messages and error codes — “Not registering: error codes”.
D-Series: why you cannot configure it by hand#
For the D-Series (and for the entry-level P310/P315) the Sangoma documentation describes exactly one way to configure the phone — from a configuration server: at boot the phone looks for FreePBX, PBXact, Switchvox or the DPMA module in Asterisk over multicast DNS, or receives the server address through DHCP option 66, and pulls a ready-made configuration file from there. Manual entry of a SIP account through the D-Series web interface is not described in the vendor documentation ⚠️ verify — that web interface serves network settings and diagnostics.
What this means in practice:
- If the venue has its own FreePBX/PBXact, the D-Series phones are configured from it as before — and they will not connect to our PBX at the same time.
- If there is no server of your own, a D-Series phone requires you to run a simple web server holding the phone’s configuration file and hand out its address through DHCP option 66. That is a system administrator’s job, and the vendor states honestly that on a “foreign” PBX such a phone loses its proprietary features and works as an ordinary SIP phone.
- The practical choice for our PBX is a P-Series handset (or any phone with a normal web interface — Yealink, Grandstream, Fanvil), leaving the D-Series where its native server lives. All the more so since vendor support for the D-Series ended on 1 December 2023.
Models in the family#
| Model | Screen / lines | PoE | Setup specifics |
|---|---|---|---|
| P310 | monochrome, entry model | 802.3af | Configured by a configuration server, like the D-Series |
| P315 | monochrome | 802.3af | Same as the P310 |
| P320 / P325 | monochrome / colour | 802.3af | Full web interface with a Lines tab — set up per this page |
| P330 | colour | 802.3af | Same, with more programmable keys |
| P370 | colour, top model | 802.3af | Same, supports expansion modules |
| D60 / D62 | monochrome | 802.3af | Configuration server only; support ended 2023-12-01 |
| D65 | monochrome, gigabit, Bluetooth | 802.3af | Same; reset with the *86 combination during a restart |
| D80 | colour touch screen | 802.3af | Same; reset by holding three screen corners for 7 seconds at boot |
| D40 / D45 / D50 / D70 | monochrome | 802.3af | The oldest models; reset through the 5 → 2 menu |
The S-Series handsets (S305, S405, S505, S705) are rebadged phones from another manufacturer; their factory web password is admin / admin, not 789.
FAQ#
The web interface says “Access to this Web User Interface has been disabled”. What now?#
Nothing is broken: the phone has already taken its configuration from a Sangoma server (FreePBX, PBXact or Switchvox) and locked the web interface. Do a factory reset — after the reboot the web interface opens again with admin / 789.
What is the phone’s password if it was set up through FreePBX?#
Endpoint Manager in FreePBX assigns the password 222222, Switchvox generates a random one and shows it in the admin tool. The factory 789 only comes back after a reset.
Can I connect a D65 or a D80 to your PBX?#
Technically yes — they are ordinary SIP phones, but you will not be able to configure them field by field through the web interface: they need a configuration server. Details are in “D-Series: why you cannot configure it by hand”. For our PBX a P320–P370 or a phone from another brand is simpler.
Does the P-Series need a provisioning server?#
No. Our platform has no provisioning server of its own, and the P-Series (except the P310/P315) configures perfectly well field by field through the web interface. The opposite is a problem: if somebody else’s configuration server or a DHCP option 66 from a previous provider is still around, the phone will pick it up and overwrite your settings — remove option 66.
The phone accepts calls from unknown hosts — how do I close that?#
On the General tab, in the SIP block, choose “SIP Account Hosts”: the phone will only accept calls from servers it is registered with — that is, only from our PBX.
Sources#
- Sangoma P-Series IP Phones User Guide (P310, P315, P320, P325, P330, P370) — https://sangoma.com/wp-content/uploads/P-Series-User-Guide-SECURED.pdf
- Phones — What are the default login and password for a Sangoma phone? (Sangoma knowledge base) — https://sangomakb.atlassian.net/wiki/spaces/Phones/pages/429162611/Phones+-+What+are+the+default+login+and+password+for+a+Sangoma+phone
- Phones — How to Reset Different Sangoma Phone Models to Factory Default — https://sangomakb.atlassian.net/wiki/spaces/Phones/pages/417890305/Phones+-+How+to+Reset+Different+Sangoma+Phone+Models+to+Factory+Default
- Phones — Provisioning, D-Series (mDNS/DPMA, DHCP option 66) — https://sangomakb.atlassian.net/wiki/spaces/Phones/pages/23593101/Phones+-+Provisioning+D-Series
- Phones — D-series FAQs (end of support, 2023-12-01) — https://sangomakb.atlassian.net/wiki/spaces/Phones/pages/1759117313